Website Translater

Boondocking
Our Website
Motor home life started for us in 2018 and soon after the Web-Page was created.
In order to maintain the Web-Page we are asking that visitors consider a small donation.
$1 Donation
Happenings


175264
Solar on a Budget A five part series
Part 1
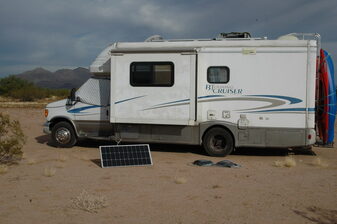
Four years ago we bought a 23 foot Class C motor home to add to our life aboard our sailboat.
The idea was to travel north to escape the Florida Summers and return in winter.
During the four years we progressed from ground zero to being able to Boondock for months at a time using Solar Energy.
There is a great deal about the subject however what is written here is from real life experience and with a strict budget in mind.
One can save a great deal of money by learning some basics and doing the instillation.
This 5 part series is for those who wish to use Solar Energy without spending a fortune!
Part 1 gives some Necessary background that is recommended and in the long run will save money, however skipping to part two can get the instillation started.
Keep in mind that there is more to solar camping than Electricity!
However to produce and use Solar Electric Power there are basically three things needed.
- Solar Cells to Collect Energy
- A Controller to regulate the voltage.
- One or more Batteries to store the energy.
These three will make a simple workable system however if 110 Volts AC is required then an Inverter will be necessary to convert the Direct Current from the Battery to Alternation Current for Household appliances.
The Solar Panels that will be used are made up from individual Solar Cells and come in three main types.
They are Polycrystalline, Monocrystalline and Thin-film.
Polycrystalline are less efficient but are also lower cost.(Example 100 Watt Poly is $80 and 100 Watt Mono is $99)
The main difference is the size needed to generate power and for that reason the larger panels tend to be Monocrystalline.
Thin Film Solar Panels are reserved for things like Calculators and such and will not be used for our purpose here.
The two types of controllers are PWM (Pulse Width Modulation) lest expensive and less efficient, and MPPT (Maximum Power Point Tracking) which is much more efficient.
The first controller we used was a $14 PWM which served for almost three years with 260Watts of Solar Panels on the roof.
Batteries are the backbone of any solar system because no energy is produced after sunset, in fact solar does not “run” anything it provides charge for batteries..
There are generally 3 types at least for our purpose all are Deep Cycle Types.
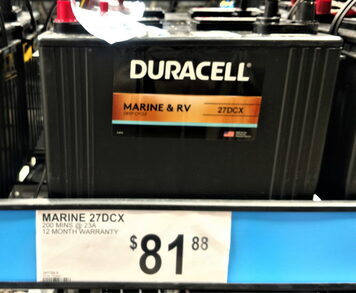
(Caution do not use “Marine Deep Cycle Batteries” there are really a combination Start/Deep Cycle designed for outboard use)
- Standard Lead-Acid (Flooded Lead Acid –FLA)
- Absorbent Glass Mat is (AGM) an advanced lead-acid battery that provides superior power to support the higher electrical demands of today’s vehicles and start-stop applications.
- Lithium batteries are “King of the Hill” with Rolls Royce prices.
Least expensive are the standard Lead-Acid
Deep Cycle comes in 6 and 12 Volt.
The 6 Volt type is common in Golf Carts and is a bit more rugged than the 12 Volt ones.
The 6 Volts must be used in pairs series wired for a 12 volt system.
AGM batteries are similar chemistry.
AGM batteries are extremely resistant to vibration, offer better cycling performance, and are totally sealed and maintenance-free.
AGM also come in 6 and 12 Volt.
For many years I used two 12 Volt FLA batteries with good success.
At the time AGM Batteries were a little over twice the cost of my FLAs now the cost is very close and we have switched in our motor home.
I have not yet become a fan of Lithium Batteries and it is not just because of the cost.
As more is learned about these batteries the less I am convinced!
Lithium batteries are not a simple drop in replacement and I know of one boat owner that recently had their insurance canceled pending a complete inspection of the instillation.
Fire danger is quite real and currently these batteries are simply not part of any budget instillation.
This should be enough background to get started.
There are 2 ways to add solar power for your rig, start small and add or all at once.
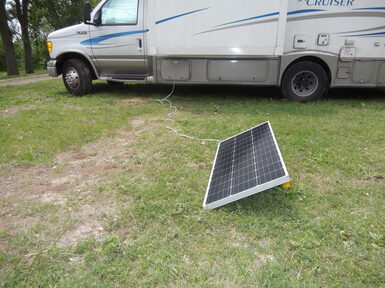
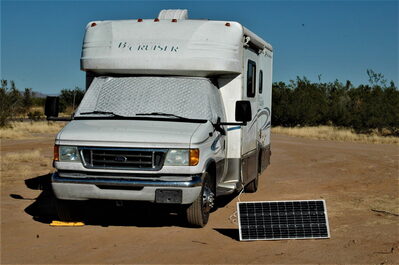
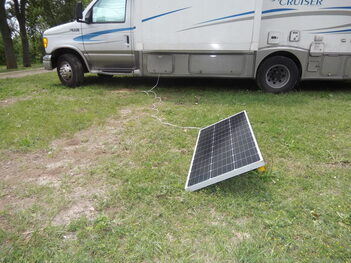
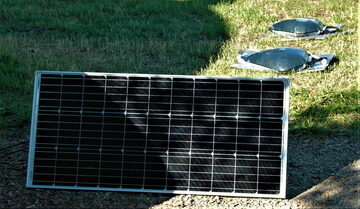
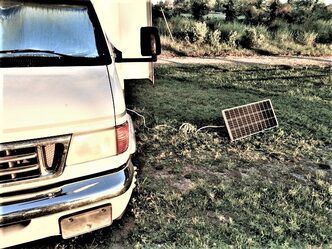
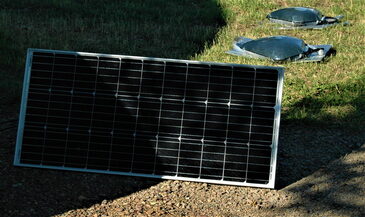
We started with a single 100 Watt panel and attached it to the Controller and batteries with a clip (see photo)
It was portable and worked fairly well as long as there were no trees or clouds but at least it worked!
Now it is time for a little math (sorry)!
This part can be skipped and things will work but it just might be nice to know WHY!
A 100 Watt panel under ideal conditions will deliver only about 7 amps!
This is where things get confusing so hang on!
We use Watts because they are consistent things like Amps and Volts are dependent on each other.
Watts are simply Volts multiplied by Amps (W=V*A) but watch out its tricky when you add the inverter!
An inverter changes 12 Volts Direct Current (Battery) to 110 Volts Alternating current to run household appliances like that computer!
But here is the problem when converting from one to the other it takes much more battery to run things.
Example a standard 60 Watt light bulb uses 0.6 Amps on 110 but run through the inverter and it jumps to 6 Amps so the battery discharges at the rate of 6 Amps an Hour.
A 100 Watt Panel is producing 7 AMPs so not much is left for charging the battery.
This is where the term Amp Hour (AH) is used to figure the load.
So in theory my 108 AH battery will run the light bulb for about 12 hours (Using 50% again note everyone uses this value but in practice there is more available), hook up a Microwave and its minutes!
With our computers plugged in and the 100 Watt panel attached, the reality was we were only keeping up with use and little left for charging.
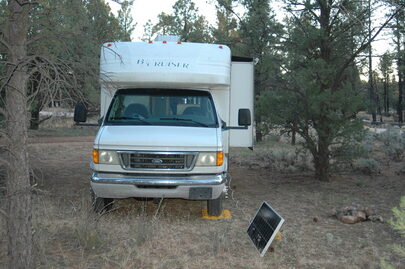
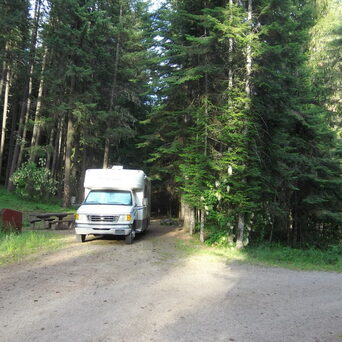
We discovered very quickly that 100 Watts was not going to be enough, and after a few cloudy days and one camp in the forest proved it!
As stated in the beginning using Solar Energy is more than producing Electricity, the other important part is lowering electric dependence.
LED lighting technology, as well as using less 110 Volt AC appliances will go a long way in extending the ability to be off grid.
Before I close a word about pre-packaged kits, most are overpriced and not expandable.
Most of the components are of low quality for the cost.
Download this document here.
|
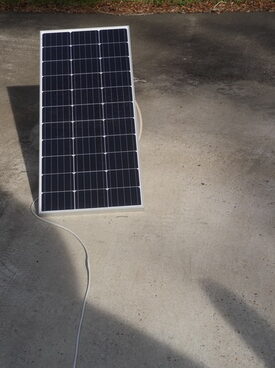
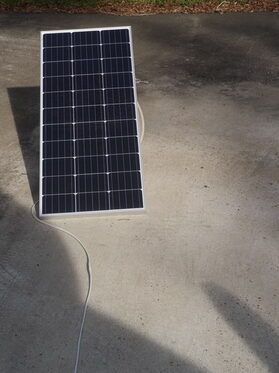
First 100 Watt Panel |
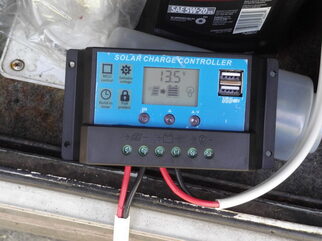
First Low Cost PWM Controller |
First use of 100 Watt Solar Panel and Connections Ottawa State Fishing Lake, Minneapolis, Kansas (Yes Kansas) |
|
Setting up Portable 100 Watt Panel With PWM Controller and Battery Clips |

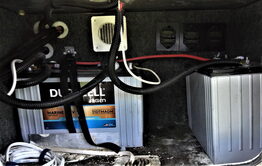
Two Original FLA Deep Cycle Batteries |

Two AGM 108 AH Batteries Replace FLA Batteries_ |
|
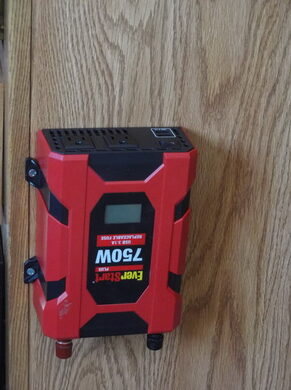
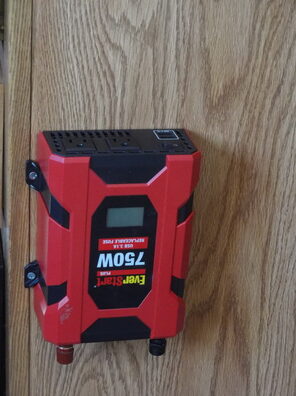
750 Watt Inverter |

Excessive Tree Shadow at Cabin Creek, Washington Convinced us that more was needed |
|
|
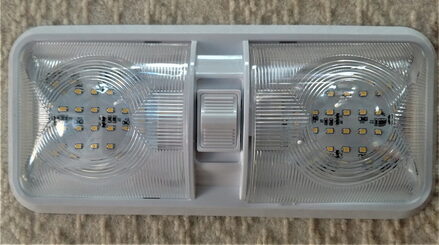
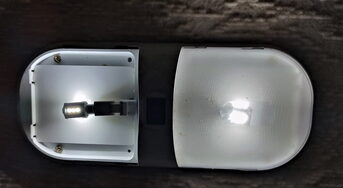
Light Emitting Diode (LED) Replacement Light Fixtures |
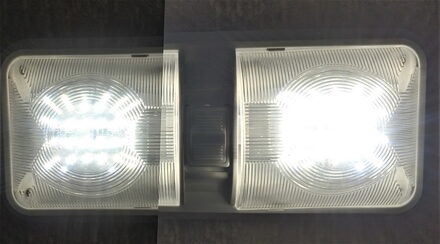
Light Emitting Diode (LED) Replacement Light Fixtures |
 |
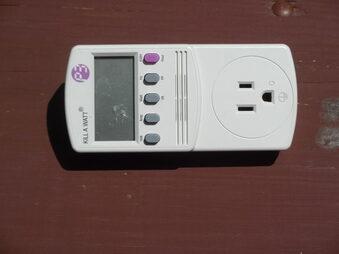
Kill-A-Watt can measure Wattage and Amperage of any appliance used
|
Solar on a Budget Part 2
Installing Solar Panels
After using the information in Part 1 the decision on how to proceed and the selection of components has been accomplished.
So now the fun of installing a solar array on the roof of the motor home or trailer begins!
Before starting the decision to grow slowly or add a complete system at this time must be made.
For either choice start by measuring the available space and compare with the size of projected panels.
This will ensure the ability to expand later.
The single most difficult part is finding a way to lead the wires from the panels on the roof to the battery box in the RV.
Oh! You lucky people that have a “Pre-wired” RV!
The rest of us have to figure it out!
Each RV is different so specific instructions are impossible - check U-Tube for your model, however again for specific questions contact me and I will try to help.
Many installers run the wires down the vent for the refrigerator and furnace and under the sub floor to the junction of the electric panel and converter.
The Converter is what keeps the house batteries charged, there should be 2 large and 2 smaller wires running into it.
The large wires should be Red and Black and travel to the house batteries
The Smaller wires are from the Shore Power side and are 110AC.
In actuality the converter is a fancy name for a battery charger.
Hopefully there is a terminal with bolted connection at the converter and also there should be a Disconnect Switch on the Red Wire that will disconnect the batteries in an emergency, If there isn’t now is a good time to add one!
The Solar Controller will be tied in between the Solar Panels and the Battery Terminals at the Converter.
Find a clear place near the junction to place the controller.
There will need to be 4 holes drilled for the wires to reach the controller.
Do not attach any wires at this time.
Naturally on mine I would need to remove said fridge and furnace to do so!
Someday I will, because it would be nice to be able to see the display on the controller without sticking my head into the battery box!
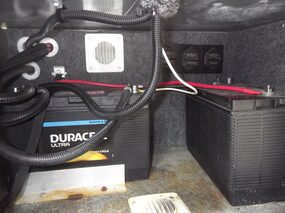
I ran mine down the side of the cab directly into the battery box (the wire is white and no one notices!)– it was simple and I did not need to drill a bunch of holes Up on the Roof (there was a song once!)
Because I already had the 100 Watt panel, and because I had no idea what I was doing I placed the first panel in what I thought would be a good location measured the open space and ordered the 170 Watt panel from Amazon to add to the first one.
Looking back and IF I was starting over I think I would have opted for two 170 Watt Panels. So, measure the space you have first then select the panels.
Mounting Solar Panels
Using the “Z” brackets is about the easiest way to mount the panels, and they are quite reasonably priced.
Attach the Z Brackets before going up on the roof (Hint the bolts are 10mm Metric) there are holes provided in most panels.
If the roof is smooth fiberglass 3M VHB Heavy Duty Mounting Tape for those not wishing to drill holes. (I watched the YouTube on this stuff and it is supposed to really stick) Naturally my roof has little tinny squares molded in so the dirt will stay on the roof! Which I had to scrub off, revealing the need to renew my roof coating as well, so this is a good time to check out the condition of the roof first.
Attach VHB Tape to the bottom of the Z Brackets but do not remove the protective paper until ready to place the panels permanently.
Now Trial fit all the panels and lightly mark location. Run the connecting wiring as desired however BIG Caution make sure the connectors are outside of the Panel Frames as they will not slide out after panels are attached. (I taped my lead wires with masking tape as they can spring back under the panels!)
Clean the location with some Alcohol remove the protective paper and place in the location be sure to watch the wires do not trap the connectors under the panels as De-Bonding the VHB is quite difficult! (Impossible without Damage)
At this point some recommend placing one screw per bracket.
Choosing to do so requires careful drilling use a depth gauge set at ¼ inch and either ½ roofing screws or the ones included with the brackets and place a sealer/caulk around the screw do not over tighten!
Skip below to wiring section.
Installation for textured roof
Before I coated the roof the positions of the panel mounting brackets were marked and masking tape placed over the area marked.
If you are not re-coating skip this step.
After the roof dried, the tape was removed and panels placed in position and the holes drilled for the great self tapping mounting screws.
They are designed to self drill the clearance hole, but I prefer to pre-drill the hole with a matching drill bit. (Too many times the drill will strip out the holes so a pilot hole is drilled and then a standard screwdriver is used)
Use caution when drilling so the drill bit does not penetrate all the way through the roof and poke through the inside! (I use a depth gauge)
(CAUTION CAUTION CAUTION!) Whether the roof is aluminum or fiberglass caution must be used when tightening or the holes will strip.
There is no easy way to fix it if that happens, so CAREFULLY hand-tighten only!
To make sure that my panels do not fly off, and because I have sailboat experience, I ran a bead of 3M 5200 Marine Adhesive/Caulk under the brackets before tightening the screws. (Available at Marine Supply Stores)
For those not familiar with 3M-5200, it is THE toughest Adhesive/Caulk in existence and would probably hold the panels without screws.
I would even use the screws with the tape----I’m paranoid when it comes to things I can’t see falling off!
Wiring the panels together
Wiring instructions are for a 12 volt system using parallel wiring. (Simple and does not require a MPPT Controller)
I used the Y connectors and # 10 Marine Pre-Tinned Hookup Wire. (Again from boating also available at a Marine Supply store)
It is a bit more expensive but super resistant to corrosion (Like that green stuff you find in old wires!)
I also use a multi-meter to test the lead wires from the panels to be sure positive is connected to positive and negative to negative for all panels.
Theoretically they are already pre match but I like to make sure~!
The type of controller used is important for the next step there are 2 types PWM and MPPT (Better).
With a PWM all panels must be in Parallel and the same Voltage (Positive to Positive and Negative to Negative)
With a MPPT they can be in a combination of series however I prefer to keep them Parallel some claim to get slightly more charge in series but I really do not think the difference is worth the trouble.
When hooking up to batteries make sure you follow the instructions for the controller to avoid that little blue smoke!
With mine the controller is mounted and wires run to the batteries first.
Now with the controller mounted near your Converter and holes drilled run a #8 or #10 Red wire from the + side of the controller to the Big Red Wire at the Converter. (Usually that is a battery pictured about them)
Then run the same size black wire to the Big Black Wire on the converter.
Maybe redundant but be sure positive to positive and negative to negative.
Most controllers will either recognize battery type or it needs to be programmed in BEFORE attaching wires from solar panels.
Also at this time you should get a voltage display somewhere between 12 and 14 volts.
Disconnect from Shore Power.
If it is a bright sunny day, cover the panels before attaching the wires to the controller if the array is large a rather large arc and possible shock may happen.
Secure the wires from the Solar Panels inside the cabinet to prevent vibration and feed the proper wire through the predrilled holes.
Again make sure the Red is Positive. (I use my millimeter to make SURE!)
It is quite easy to mess everything up by connecting wires reversed, that is why I check each panel and every connection before joining and again double-check at the end.
One woman at our campground had a “Professional Insulation” that melted her converter the first time she turned it on!
Now sit back and watch the numbers display that nice free electric charge the batteries are receiving ---- unless something went wrong!
Figuring Power Output
To help figure the output of the array the Watts are divided by 14.2!
Why 14.2?
Because most controllers are factory set for a charge of 14.2 Volts and in fact that is about the best charge rate for standard Lead Acid Flooded and AGM batteries.
Lithium Batteries are a different story so if you are using them be sure your controller can be programmed for them! (Usually only High End Controllers handle Lithium)
(Remember Volts multiplied by Amps = Watts)
So our original 270 Watt array would produce about 11 AMPS under ideal conditions (which was seldom!)
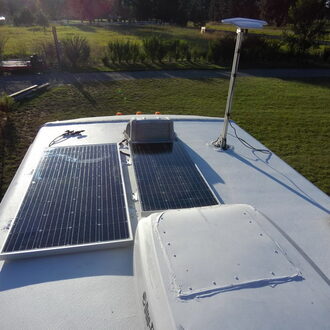
Currently we have expanded to 470 Watts Roof Mounted and an extra 100 Watts portable.
This provides 40 AMPS of charge at peak and we have seldom needed our generator even on cloudy days.
Download this document here.
Inspecting and Prepping the Roof |
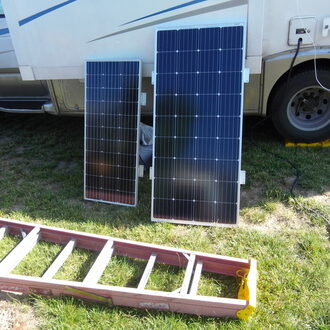
Attach the Z Brackets while still on the ground |
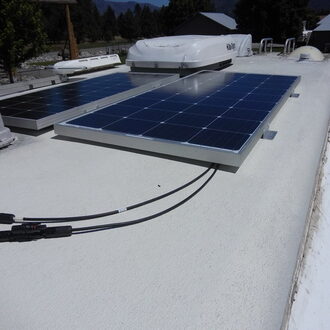
Mounting Panels with 3M VHB Heavy Duty Mounting Tape or Screws Caution do not trap wires under panels |
Positioning and Mounting the 2 Roof Mounted Solar Panels With Y Connectors for Parallel Wiring. |
Working With Battery Wiring and Connections (Original FLA Batteries) |

Mounting the Controller and Wiring to Batteries. |
Invisible Lead in Wire Detail |
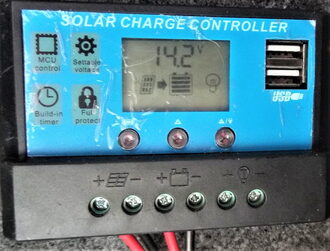
Within a few Minutes the Voltage was 14.2 With PWM Controller and 270 Watts |

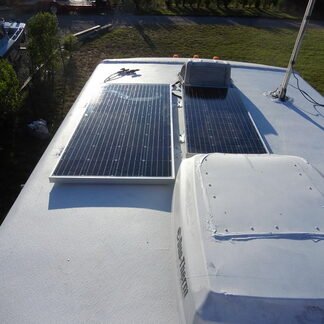
Overview of Final 470 Watts Roof Mount |
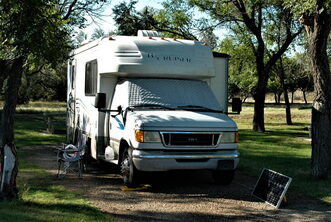
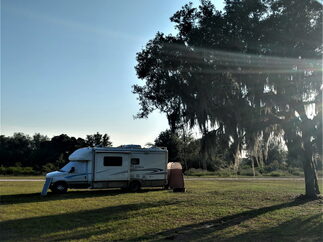
Parked at Park Link BLM Camp with Auxiliary 100 Watt Panel |
Auxiliary 100 Watt Panel to Overcome Tree Shadow at Fire Road 302 Campground Grand Canyon, AZ |
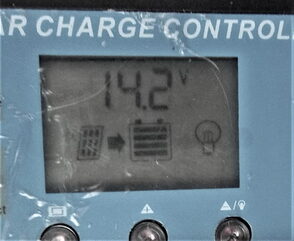
Voltage Has Reached 14.2 After adding the 170 Watt Panel and Reaches Full Charge Daily |
|
|
|
Solar on a Budget Part 3
Solar on a Budget Part 3
Using Batteries
Batteries are the backbone of any Solar System and Part 3 is devoted to not only using batteries, but to dispel some battery myths.
There are advantages and disadvantages to all battery types. Learning the limitations is very important. Batteries are tough but can be destroyed quickly by mishandling and that gets costly in many ways.
There are two basic types of batteries start and deep cycle, and some are a combination of the two.
Briefly the battery used to start the engine is designed to produce high amperage for a short period of time and will recharge quickly.
Deep Cycle batteries are designed to discharge slowly over a long period of time and will take longer to recharge.
Solar Systems depend on Deep Cycle Batteries and of these there are three major types.
- Flooded Lead Acid (FLA)
- Absorbed Glass Matt (AGM
- Various Lithium Ion Types
FLA and AGM share the same Chemistry and performance characteristics.
Lithium Ion not only has different charging requirements but for safety must have a management system to prevent possible fire from overheating.
Battery selection and maintenance
I am not going to get into discussing the various types as that seems to start arguments faster that politics. Buy what you can afford and take care of what you buy!
However for the budget minded FLA and AGM will perform quite satisfactorily.
Our original batteries cost $109 each and were true deep cycle 12 volt batteries.
They are old technology but I have used them on boats and in our motor home for 17 years.
In 2020 we upgraded to AGM 108 AH batteries for about$180 each.
When I bought my first sailboat AGM batteries were around $280-350 depending on the source.
This section is for Flooded Lead Acid batteries only. (FLA)
People have told me everything from sulfating does not start above 11.4 Volts to 12.2 Volts is killing the battery!
Batteries can only discharge to 50%.
Sulfating occurs when a lead acid battery is discharged too deeply or stored without a full charge.
Once a Lead Acid starts Sulfating it will start to deteriorate and after a point it is not reversible.
There are many opinions, so I went to the source and asked a Chemical Engineer from a battery company about the subject.
Actually it's not the voltage that matters so much, it is whether there is chemical activity occurring.
As long as charging or discharging is taking place the electrolyte will resist sulfating, that is: up to a point.
Question is, where is that point.
Importantly, in lead-acid batteries, if too low of a state of charged is reached than electro-chemical pressure is too low to prevent Sulfation.
This is where that idea of 50% comes in.
But is that really a true figure?
Not according to the engineer and if 12.4 volts is supposedly discharged, than the batteries would be considered discharged pretty much most of the time!
Again it is chemical movement, however flooded or AGM battery (Absorbed Glass Mat, which is a specific type of lead-acid battery) must be brought to full charge (14.2 to 14.4 Volts) to prevent damage at rest.
We have taken our voltage as low as 11.6 with no damage and so far our batteries have been in use for 3 years, our boat batteries 6 years!
The key is that they started charging immediately by driving or the generator use and charging continued until full!
Also a Lead-Acid battery should be fully charged between cycles to prevent sulfating at rest.
This is one area where the Lithium has an advantage as they are less prone to damage when stored partially charged.
All other batteries will only accept high charge rates to80% charge then only accept approximately 10 AMPS per 100 AH capacity.
One of the beauties of a solar charging system is simply the sun comes up every morning so the batteries stay in constant flux!
Another advantage is that the Solar System is charging even parked and the ignition is turned off.
Because that final 20% charge may not be present when the Rig is stopped or disconnected from shore power damage may occur.
Use these guidelines and the less expensive FLA and AGM batteries will provide a long useful life.
One advantage of Lithium Batteries is they can tolerate a deeper discharge and do not need to be fully recharged at rest.
This is why a Lithium battery will have more usable charge.
Use this information to weigh the cost verses the advantages/disadvantages to make a battery decision that will provide the most cost effective use.
Battery Sources
There are a number of sources for batteries.
Most batteries are either private labeled for individual retail outlets or sold directly by a wholesale outlet.
There are also independent battery rebuilders that sell refurbished batteries.
Many years ago (1950-1960s) batteries were sealed with tar and could be opened, however today’s battery cases are some form of composite with no way to open without destruction.
Rebuilders chemically dissolve the sulfated deposits and replace the acid.
This however, does not replace the lead in the plates and may lead to diminished capacity.
I can not remember how many times my car would not start in the morning, therefore it is best to avoid a “Reconditioned” battery.
Two good sources for reasonably priced batteries are Batteries Plus Bulbs and Sam’s Club.
Batteries Plus Bulbs are also located throughout the United States and will homer each store’s warrantee.
Interstate Outlets usually have a wide selection especially in total locations.
Many auto part outlets may have a decent selection but most are starting batteries and will also carry a markup in cost.
Wal-Mart doesn’t carry suitable Deep Cycle Batteries but may be a source for LED replacement bulbs.
Originally I wrote that there is more to solar than just electricity.
Conservation is a very important way to have longer life from any battery.
Using LED lighting that draws less as well as limiting power robbing accessories will not only help extend battery life but will provide more opportunities for wilderness camping.
Download this document here.
|
Two Original FLA Deep Cycle Batteries |
Upgrade to 2 AGM 108 AH Batteries |
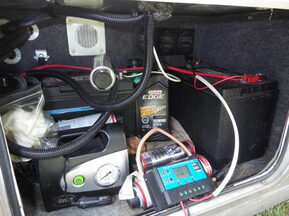
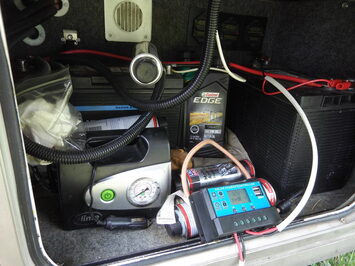
Battery Box showing Solar Controller and Connections for portable 100 Watt System |
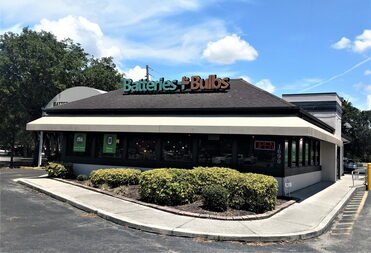
Batteries + Bulbs a Good Source for Batteries |
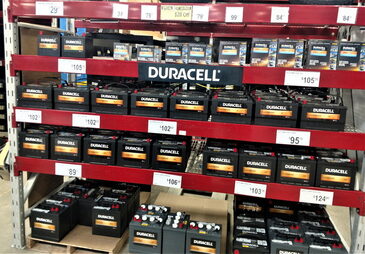
Inside Battery Bulbs Selection |
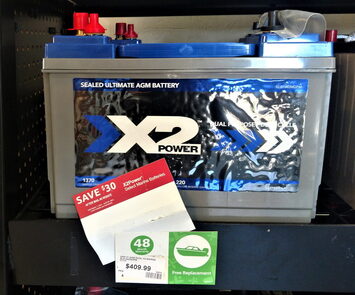
Super Duty AGM $420 at Batteries + Bulbs |
FLA Deep Cycle at Sam's Club |

Small AGM at Sam's Club |

Sam's Club Empty Shelves for High Demand 108 AH AGM |
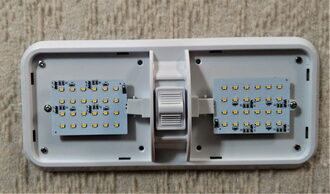
New LED Lights for the Motor Home |

New LED Light Fixture |
Solar on a Budget Part 4
Our Solar Experience
This section is designed to not only explain the reasoning behind our decisions but to help guide those interesting in adding Solar Energy.
Again I will state using Solar Energy is more than just generating electricity.
Hopefully all those interested have installed working arrays or are still planning to do so.
With a Solar Generating array up and running it is time to expand thinking beyond electrical generation.
Park in the sun it becomes apparent very quickly.
Park in the shade the RV stays cool but there is little or no performance from the solar cells.
There are many other ways the sun can be used to perform necessary tasks.
The reader is invited to explore with our four stages of development.
Each stage taught valuable lessons that helped maximize not only Solar Use but expanded the ability to extend Boondocking opportunities.
Currently we are about as self contained as possible and all was accomplished with a 23 foot Class C Motor Home.
Stage 1
We left Florida June 4, 2018 and from June to October of 2018 we had no solar cells and depended on our Generator and the motor home engine in transit to keep batteries charged.
The idea was to escape Florida’s hot summer and the need for Air-conditioning.
Lows in the 20’s and highs in the 80’s were encountered.
We ran the furnace on nights below 40.
The original “Marine Deep Cycle” battery was not only the wrong type but was dying!
The replacement was two Flooded 12 Volt Deep Cycle Batteries rated at 145 AH.
The first thing we did was to replace all the interior lights had LED bulbs from Wal-Mart.
Also a a 750 Watt Inverter was purchased to run and recharge our computers and cell phones.
The inverter was not installed until sometime later reaching Thompson Falls, Montana.
A small inverter that plugged into a cigarette lighter was used during travel.
The Inverter was not connected to the motor home AC circuits and was mounted close to the work station and junction box.
The voltage is now directly read off the display.
When the Voltage went to 11.8 we either started the generator or if we were leaving we let the engine charge the batteries.
The furnace could run all night with this setup.
The lessons learned at this stage were not only to have less dependence on the computers but to plan ahead for weather change.
Cost for Stage 1 modifications
Wal-Mart --- Inverter $39, Replacement Bulbs $47.50
Batteries (Batteries + Bulbs)--- $218
Wire and Connectors for Inverter $20
Total Cost --- $324.50
Stage 2
In October 2018 we received the 100 Watt Panel as a gift and while we were in Texas sent for hookup wire and made a portable setup with battery clips and an inexpensive PWM Controller.
The portable setup was constructed with *Marine wire, the strands are much finer and each individual strand is tinned. The fine stranding makes the wire very flexible, allowing it to better survive in a moving, vibrating boat, while the tinned strands provide additional corrosion protection.
A simple Auto Battery Clip was used to attach panel to the batteries.
It was first used it June 2019 while camped in Ottawa Fishing Lake in Kansas.
Because this was the first use we kept track of performance and about every 2 or 3 hours I’d run out and move the panel for optimum exposure.
We ran the laptops all day and at the end of the day the maximum charge was 13.5 Volts.
We thought that was great!
Our next stop was Cabin Creek Washington.
Tall trees made for dismal performance!
Each day the overnight voltage became lower.
Running the laptops took almost everything the 100 Watt panel produced.
The third day the generator was used to bring up the charge!
Cost for Stage 2 modifications
Renogy 100 Watt Solar Panel -- Free
(Note the price at the time was $150)
Amazon Closeout for PWM Controller - $18
Amazon --- 50 feet Tinned Wire -- $40
Auto Zone Battery Clip -- $4.98
Total Cost $62.98
($212.98 if we had bought the panel)
Stage 3
Cabin Creek was convincing to make the decision to add more Wattage and made on the way to a friend’s house in Thompson Falls Montana once more.
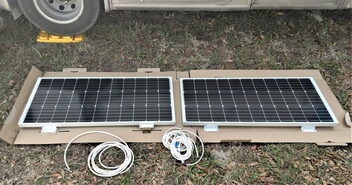
After measuring a 170 Watt Panel was ordered.
The 170 and the 100 Watt panels were going on the roof because there was no room to carry both, and the portable setup could not be used in Rest Areas or Parking Lots.
"Y" Connectors, "Z" Brackets, Roof Coating, and 3M 5200 marine sealant were ordered from Amazon.
The original plan was to bring the lead wires in through the roof vent for the Refrigerator under the sub-floor and connect where we had our Inverter ---- Except it was discovered that half of the motor home would need to be dismantled!
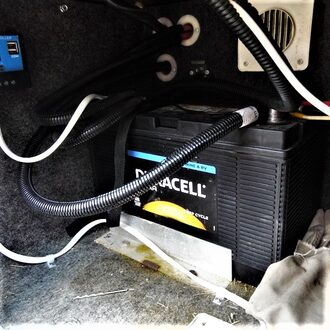
An Alternate route was used directly down to the battery box. (See Photo)
There were handy screws to attach the clips and the #10 Wire just fits!
However, I still consider this temporary!
By the end of the first day the voltage was 14.2.
The next day disaster struck, the voltage would hit 14.2 and then the controller would turn off!
It would not start again until the next morning and then do the same!
Tried everything to program disconnect and connect and so on and finally ordered a better MPPT Controller and took off for Finlay Flats Campground in Montana while we waited for the new controller.
Funny thing happened when we got to the campground everything started working and kept working until 2020! (Pure *** Magic!!!)But had to replace a leaky faucet!
Everything was ordered from Amazon except the Faucet.
Cost for Stage 3 modifications
Amazon Rich Solar 170 Watt Panel -- $169.98
Amazon Mounting Kit -- $40
Amazon 3M 5200 Adhesive/Caulk 00 $19.95
Hookup Wire was pirated from Portable setup.
Total Cost $229.33 adding the 100 Watt Panel would still be less than $400 less batteries.
Stage 4
We ran the system until February 2020 using the original PWM Controller mostly because I was too lazy to get into the battery box and replace it.
Besides “If it ain’t broke don’t fix it!”
About a month later when Dawn was checking the battery water level she noticed we did not re-attach the ground wire to the second battery!
We had been running on only 1 battery for almost 6 weeks!
This is why I do not run two - 6 Volt Golf Cart Batteries, I would have destroyed the controller - possibly the solar cells, and at best the refrigerator would have stopped working and at worse the Refrigerator motherboard would have died!
When we arrived in Florida after a few flat cloudy days it was decided to see how much we could add.
With a lot of work we could add a 170 and 100 Watt panel
With a little work 2 more 100 Watt Panels!
Anyone who has tried to De-Bond 3M 5200 marine sealant would realize the 70 Extra Watts is not worth it!
The MPPT controller was installed while we waited for the 2 new panels to arrive and went back to Deep Creek Campground Florida.
The difference in performance with the MPPT controller was amazing.
It would reach 14.2 faster and stay longer which helped our overnight low to stay above 12.2-12.4 depending on how much TV (video on a tablet/laptop) Dawn watches!
The 2 new panels were added the same way using 3M 5200 to seal and bond the Z brackets.
All connectors were kept accessible but the longer wires were run under the panels to prevent clutter and the possibility of wind damage.
It was late in the evening when everything was finished and turned on.
The battery voltage was at 14.2 by sunset and the next morning by 7 it was passing 12.9 to 13! (I got up at 5am!)
Now even on overcast days the system achieves float!
Cost for Stage 4 modifications
2 Pack Renogy 100 Watt Solar Panels -- $190
Additional hookup Wire and 3M5200 -- $25
Total Stage 4 $215
By building the Solar System in stages the cost was manageable but more important the increase in performance was able to be tracked.
The total cost for the entire project was $831.81 for a 470 Watt system, which included the two Batteries.
During a trip to meet up with friends we decided to purchase another 100 Watt panel and carry it as we did in the beginning.
The single panel was $103.44 bringing the total to $935.25 which just about the cost of 2 100 AH Lithium Batteries ($270 to$299 each)
With Sailboats or RVs it is doubtful any project is every finished.
However for all intents and purposes the Solar Array is finished as there is no more room on the roof.
The last modification was made in 2020 and to date all is still working and even on overcast days the batteries reach full charge. Occasionally the Auxiliary 100 Watt Panel is used in high forest locations or those overcast days when a little boost in needed.
We survived quite well with only 270 Watts and two Batteries because of a combination of Electrical Conservation and some careful maneuvering to maximize sun exposure.
I must admit I think about things a lot less with more power.
Perhaps the early days developed practices which will help continue in the future.
Everyone could use a little more conservation.

Battery Compartment with 2 Deep Cycle Batteries |
LED Replacement Bulbs |
The 750 Watt Inverter Inverted for access to outlets |

The Inverter is not connected to house AC circuit but used as a stand-alone and gets lots of use |
First 100 Watt Panel |

Battery Box showing Solar Controller and Connections Using Battery Clip From Auto Zone |
First use of 100 Watt Solar Panel and Connections Ottawa State Fishing Lake, Kansas |
Huge Shadows while Camped at Cabin Creek, WA |
More Tall Trees at Big Eddy Campground, Montana Prompted the decision to add Solar Panels |
|
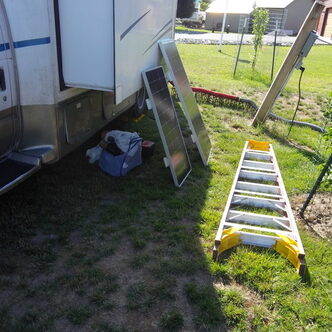
The Two Panels ready for Instillation and the lead-in wire will be in front of slide-out and behind cab door |
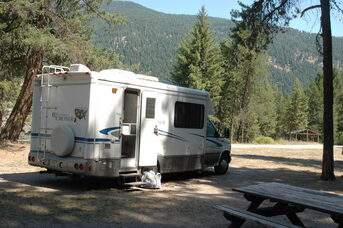
Everything started working at Finley Flats, Montana |

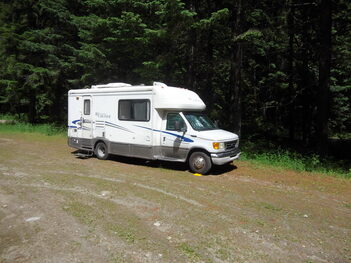
Finlay Flats Recreation Area, Montana |
Even With Tree Shadow The New Solar Panels Charged the Batteries at Finley Flats, Montana |
Two New 100 Watt Solar Panels |
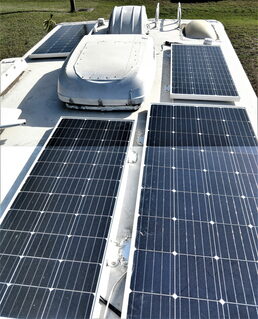
Overview 470 Watts Roof Mounted |
Auxiliary 100 Watt Panel |
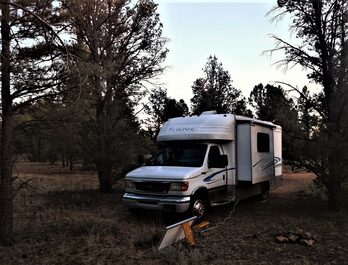
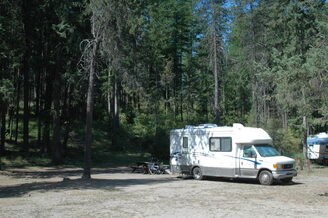
Forest Surroundings Require Auxiliary 100 Watt Panel to Maintain Batteries at the Fire Road 302 Campground Grand Canyon, AZ |

Grand Canyon, Arizona |
Parked at Park Link BLM Camp 1 with Solar Water Heaters and Auxiliary 100 Watt Panel |

Saguaro In Arizona |
Part 5 Last of the series -Solar on a Budget Part 5
Hopefully Part 5 will drive home that Solar is far more than just producing electricity.
Solar Cells are marvelous things but these other ideas are older than many reading this.
We started out in tents and later graduated to sailboats.
For many it was recreation for us it was a quest to be free.
For the most part the Sun gives us its energy for free.
All that is necessary is to learn to use it.
In order to progress beyond the dependency of civilization it is necessary to make a few life changes.
This section is dedicated to those who wish to push against the limits of Civilization and embrace the wilderness.
There are two axioms for our purpose, one must either obtain more or use less.
We started out with much less than most.
The first sailboat had kerosene lamps and stove; with minimal electric available the water was pumped by hand and heated on the cook stove.
Many an ocean was crossed in this minimally equipped sailboat.
We brought our sailing experience to our motor home and started out on a journey that has lasted nearly 5 years now.
We still maintain our sailboat and neither the motor home nor boat is nearly as stark as the original sailboat or tents.
However conservation is more a habit and a way of life.
Things can be done without electricity and some take a bit of searching.
Chopping can be done with a knife; however a chopper would be welcome convenience.
The one used is operated by a pull-cord and will quickly chop and mince many things.
The “Crock Pot.” or “Slow Cooker,” are great for preparing a meal absentia but draw lots of electric power, the Tayama Thermal Cooker (or similar) is an excellent replacement.
It is designed to hold heat for hours and will provide a hot meal upon arrival.
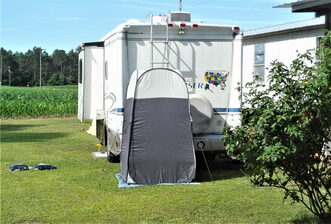
Wilderness Camping will allow the use of a complete Solar Shower using a Solar Water Heater that not only conserves Propane or Electric Power, but actually feed the environment without filling the holding tanks.
Each step the guiding motivation is to become more independent.
How the RV is equipped is as important as learning to conserve.
Far too often many transfer household habits directly to an RV.
This is probably the least independent and most costly proposition.
Many years ago I was given the advice, “Do not take landsman skills to sea,” and it applies to the RV world as, “Do not take homemaking skills on the road!”
Many things just do not work in a mobile environment.
Truly there are many homemaking skills that will apply and the trick is learning the difference.
When it comes to food preparation skills, it is more “Quantity” rather than “Quality” as the usual complement is two people.
Cold storage space is also limited.
Learning to work within this framework is necessary.
It is more a philosophy that determines the choices.
Many have reached a period in life where what has been earned and saved must last as long as possible but want to continue to travel and explore.
It is wonderful for those with the resources to maintain a “Brick and Mortar House” and travel in the RV; however the rest of us must choose.
The degree of that choice again depends on resources,
Everything is available from that 45 foot Class A Diesel Pusher pulling a 25 foot “Garage” complete with family auto and workshop to the tiny “Tear Drop” towed by a “Smart Car,”
Each has a place and a following and all must find their individual journey.
My personal odyssey has led from travel by kayak and living in tents to travel by motor 23 foot home and 37 foot sailboat.
In between there has been a kayak and tent, Volkswagen Westfalia, Harley Davidson Motorcycle, and even an airplane!
Why we did what we did Department
This series was written mostly for the budget minded.
Hopefully there are useful tips for all who wish to travel by either boat or RV economically.
A disaster brought us to the RV world; our sailboat lost its injector pump on the way to the boatyard.
Faced with a summer of Florida Heat with no Air Conditioning we found a small Class A we could afford and started heading north.
We had no RV experience but plenty of live aboard boat experience which served well.
The inverter was installed simply and gets its power from behind the electric panel, where the large battery cables are connected to the house DC connection.
It is used directly to power our computers and charge USB devices.
When camped, this is our only source of 110 AC Current.
There are a number of reasons for this, simplicity being foremost!
There is a master cutoff switch that disconnects everything from battery power. If the RV does not have this it is best to add one.
Solar Energy started with a gift of the first 100 Watt Panel, which was all that could be stored in the motor home above the slide-out when driving.
That first panel could only be used when camped and only ‘just” kept up with demand.
The limitations of a single panel were discovered in the forest of Washington state.
Still it was impressive so while visiting a friend another 170 Watt panel was added.
At the time it was all we could afford but it improved things tremendously as noted in Part 3.
We are able to survive with 470 Watts because of choices, such as a propane dual function refrigerator, propane water heater, and stove top accessories such as percolator coffee, thermal cooker and waffle maker.
Energy Saving LED light fixtures replaced the original florescent lights and Auto LED bulbs replaced the others that came with the motor home.
An inexpensive jumper wire was fashioned to keep the start battery at full charge while camped.
The small foldable Milti-meter is an invaluable tool for many uses.
Our Kill-o-Watt meter gives the current usage of any appliance.
Usually when we are camped we draw a lot of questions especially when we use our Auxiliary 100 Watt Panel.
So a Frequently Asked Question section has been added.
FAQ
- Do I do installations? ----NO!
- What is my benefit? –- Not Much we hope to help others enjoy RV life.
- Can I plug my shore power cord directly into an inverter? --- Simply plugging the 30 amp shore power cord into the inverter output will cause several problems that could not only overload the Inverter but could destroy other components.
- Can multiple power sources be connected with the solar cells and controller?--- Yes the controller and the solar cells are diode protected against backflow. Ours is constantly connected when engine or generator is running.
- How many solar panels would it take to run the Air Conditioner? --- The cost would be about the same as 2 years worth of gas for the generator.
- Can the solar panels resist hail damage? –- Generally in most cases the roof will suffer damage first. Renogy states panels can withstand hail of up to 25 mm (one inch) falling at 23 meters per second (approximately 50 miles per hour).
- How many batteries do I need? --- Much depends on your ability to conserve and how the RV is equipped. A rule of thumb guide is TT, 5th Wheel and Class C up to 25 feet two 12 Volt Deep Cycle and Larger Class A's and 5th wheels - 4 to 6 batteries (Either 12 volt or 6 Volts in pairs)
- Do I need an Inverter? --- Only if you plan to use 110 Volt AC accessories such as a computer, TV, Coffee maker, etc.
- Which Refrigerator is best for an RV? – This question usually comes up around replacement time.
- While it is true a household 110 Volt Refrigerator is much less costly in the long run Propane is still the better choice.
- One must consider the need for either constant shore power (Read stay in an RV Park) or many added solar panels and batteries to support the Refrigerator.
- This option is open only to owners of Large RV;s.
(Author’s Note; we recently made that choice when ours quit, we stayed with a duel propane/electric type)
Anything else one can think of – send an email! [Download this document from here]
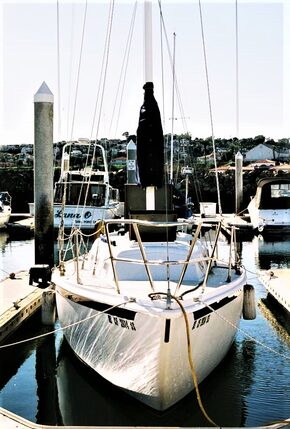
Ericson Sailboat in Dock |
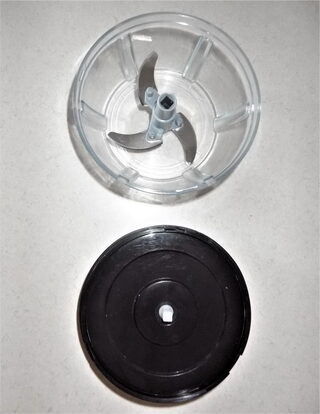
Manual food chopper $9 |
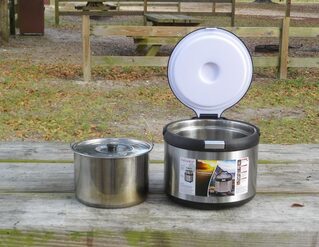
Highly Insulated Tayama Thermal Cooker |
Solar Shower |
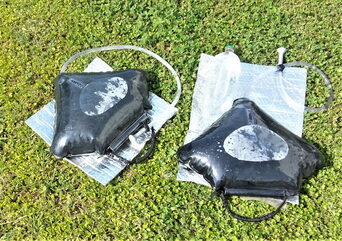
Solar Water Heaters |
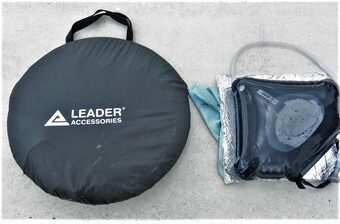
Leader Cabana and Solar Water Heater |
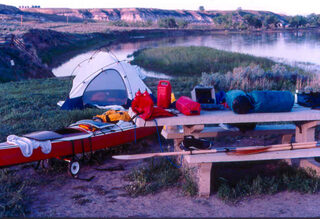
Solar Powered Kayak and Camp on the Missouri River 2003 |
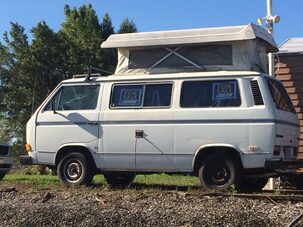
1986 Volkswagen Westfalia |
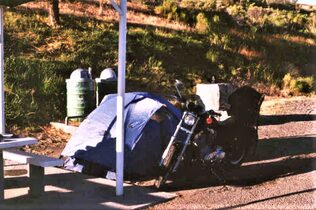
Harley Davidson Sportster With Tent Winnemucca, Nevada 2003 |

A Friends De Havilland Beaver Camped at Fort Peck Montana 2021 |
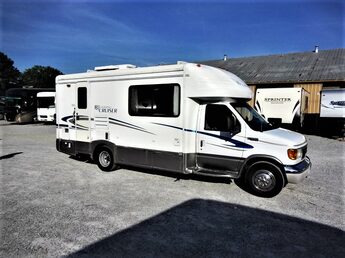
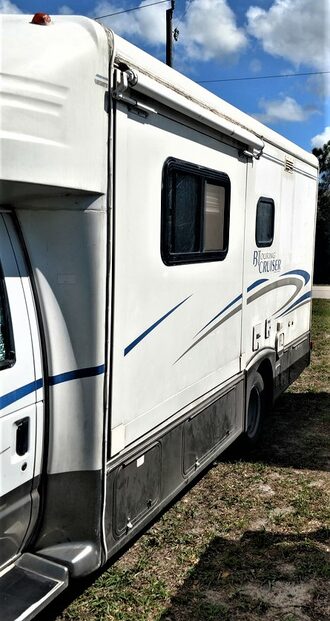
The Gulfstream BT Cruiser 23 at the Dealer
|
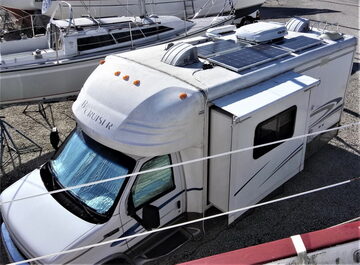
Final Arrangement of the 470 Watt Array |

The Inverter is not connected to house AC circuit but used as a stand alone unit. Connecting to house AC would trigger the 2 |
Early Morning Sun with First 100 Watt Panel |
First Roof Array of 270 Watts |

|
Tree Shadow Encourages the Use of the Auxiliary 100 Watt Panel |

Parked at Park Link BLM Camp 1 with Solar Water Heaters and Auxiliary 100 Watt Panel |
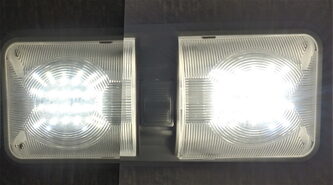
New LED Light Fixture |

Energy Saving LED Light Fixture replaced the Florescent Ones |
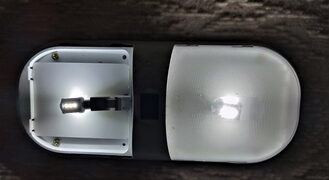
Energy Saving LED Light Fixture replaced the Florescent One |

Jumper Wire for Battery Charging While Stationary |
Charging Relay Location for Jumper Wire |

Compact Multi-meter with Continuity Test. Very Handy Diagnostic tool |

Kill-A-Watt can measure Wattage and Amperage of any appliance used |
Auxiliary 100 Watt Panel With Solar Water Heaters |
Using Solar Shower at Lake Panasoffkee Conservation Lands |
Postcript Boat to RV
Boat to RV
I wish to thank all the people who participated with comments and questions for my recent solar series.
I hope that this helped many take the plunge!
I stated at the beginning that everything written comes from 16 years of full time living on boats and in RV’s, plus many years of wilderness camping and Nature Photography.
I have written that there is more to solar camping than Electricity! There is also more to using solar energy than generating electricity! Conservation is the key to keeping cost down.
The more things that demand electricity that are used the higher the cost. More Solar Panels, larger inverters, and of course more of larger batteries!
Much has been said and written about Lithium batteries; however I have not seen these in actual practice. I am not disputing the claims - I am saying because of the price my experimenting is a bit restricted.
Someone asked me why we had 4 solar panels when they had 2 and kept their batteries charged.
First off, because of the space restriction on our roof some Panels are not in the ideal position. They are positioned so that any direction we park at least 2 have a clear shot.
It also give us a little extra margin for other things under ideal conditions.
This is just one example; the starting battery had discharged from sitting and because we have our solar system produces a bit over 30 Amps, the start battery can be brought up to full charge while we are parked and still use our house batteries to run accessories.
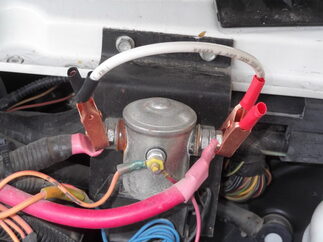
I made a neat little bridge wire to connect across the engine solenoid to bring the charge from the house batteries.
YES! I know there is a nifty electronic device that will do the same thing for only about $50 but my 2 clips and wire cost me a buck-twenty! (See Photos)
Bottom Line using solar power is one of the greatest tools for not only RV Boondocking but for us full timers - an almost necessary tool!
(Note if you missed the 5 parts email me and I will make arrangements for you to get them)
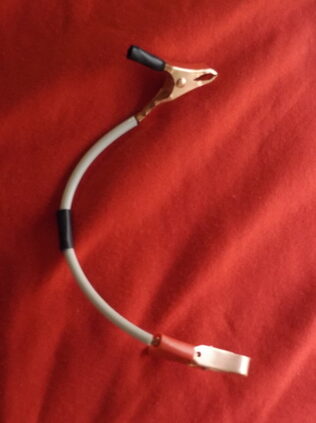
Jumper Wire for Battery Charging |

House Charging Relay With Jumper Wire (The advantage is I never forget the hood stays open while its on) |
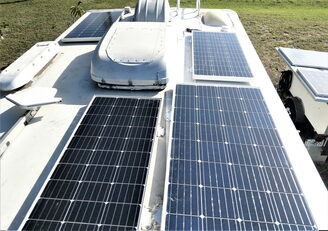
Final Array 470 Watts 33 Amps at 14.2 Volts $640 |